Growing blanch leeks for the show bench
- By Digger Evans

This is part of a new series that will be exploring the ins and outs of Growing for Showing. In this first article, Digger Evans talks about growing blanch leeks for exhibition.
What the grower is aiming for is to produce a 'blanch' leek worthy of a prize at the local show, and the show judges will be looking for a nice clean sturdy leek in pristine condition, and the exhibitor is demonstrating his or her ability to produce a top quality leek on the day of the show. This sounds complicated, but with a little care it isn't hard to achieve an enviable result.
So if you fancy the idea of growing some vegetables for exhibition at the local show, now is the time to begin.
Most people growing leeks for showing will already have their leeks potted up, usually from 'clones' of the parent leek, often referred to as 'grass'; these are tiny little leeks not much different in appearance to a blade of grass. Firstly, these tiny leeks are potted into a tub and basket of ready-mixed compost and placed in the greenhouse, with some gentle heat beneath them.
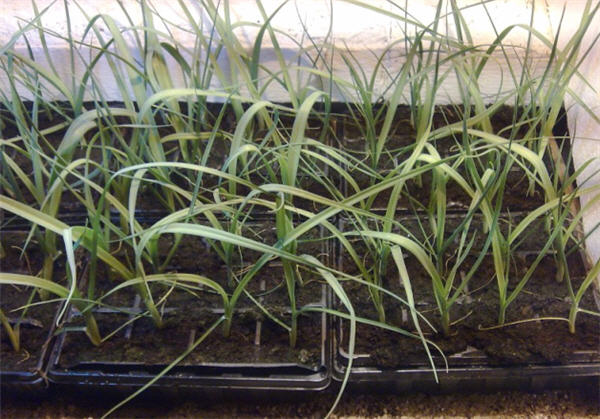
Young blanch leeks growing in modules
The heat can be supplied using a ready made plant propagator, with the plastic lid removed, or you can buy an electric soil heating cable, or a heat mat. All these options will require a greenhouse with electricity. Leeks can be grown without this heat, but will be far superior if this heat can be provided.
It is of vital importance for the leeks that once the heat is applied, it should never be allowed to cool down. Leeks are biennial and if a period of cold temperature occurs then the leeks could begin to run to seed; in simple terms, this means the leeks will think they have had a winter and begin to produce a flower - if this happens all is lost!
Once the heat is sorted out, the leeks will need daily monitoring to ensure the moisture level in the compost is at a constant. That is; the compost must never be allowed to dry out or get waterlogged, and this is no different to keeping a careful eye on the plants, such as you would with any house plant.
We want the leek plants to have a good healthy, uniform appearance, without any obvious faults or any signs of damage. The stem of the leek in exhibitor-speak is called the "barrel", the leaves are called “flags” and the point at the top of the leak, where the blanch finishes and the flag begins, is referred to as the “button”.
It is not the intention to grow an oversized giant curiosity but a nice, large healthy plant. To get a decent size and condition for the leek, it is essential at the early stages to encourage as much steady growth of the flags as possible; the better the flags are in the early stages of growth, the better the barrel will be.
Encourage steady growth
There are a number of ways to encourage steady growth of the flags - the first is by using a feed for the leeks that contains nitrogen. Nitrogen is needed for growth of the green flags and I usually use a soluble high-nitrogen feed at half strength. This is given first once a week until the leeks need potting onto 1 litre pots and then it is given every two or three days alongside ordinary watering.
Provide extra light to promote strong growth
Due to the time of year that the leeks are started, the available natural daylight is short and usually of poor quality, by that I mean it’s too dull and only available for four or five hours a day, but this can be remedied by using artificial lights.
Lights are not essential for leek growing but, if they can be provided, you will gain the edge against your competitors. Light is needed by the leeks in order that photosynthesis can take place and the leeks can manufacture their food and process, and make good use of, the available nutrients. Red and Blue light waves from the spectrum will greatly encourage rapid growth of the leek plants.
There are a range of lights available to us; the lights I use are a large light called a Son t Agro, this supplies the red and blue light waves and I supplement this with a daylight bulb that provides every light wave in the colour spectrum, imitating natural sunlight.
The lights are switched on to extend the daytime light for a few more hours than is naturally available at this time of year. If you cannot provide the light artificially, try to get the leeks as near to natural daylight as possible - right up against the greenhouse window is preferable.
Growing straight
As the leeks grow, more leaves or flags will develop, and it now becomes important to keep the leeks growing as straight as possible, which may mean turning the pots each day to allow light onto all parts of the plant.
When the plants have two flags and one developing in the centre it’s time to pot them up to a one litre pot. I use round pots that are quite deep, this is my preference and square pots can be used if desired. At the time of re-potting I insert a small, split cane that can be used for tying the leek to.
The compost used for potting up is a general multi-purpose tub and basket compost, with a little fertiliser added, and at this stage I use Osmocote granular fertiliser at the rate of perhaps two tea spoons full for every five litres of compost. It is important to put the split cane into the pot along side the leek and then fill in around the leek and the cane, as doing this will prevent you damaging the roots of the plant by pushing a cane into the pot after it is filled.
To keep the leek actively growing and growing straight, the same gentle bottom heat needs to be applied and the leek can be gently supported against the cane with soft green twine tied very loosely around the leek and the cane. If you are not able to use artificial light it is now of the utmost importance to 'rotate' the position of each pot so that each leek gets as much available light as possible.
The leeks should be kept in the same conditions by using heat at the bottom of the pots right through until April. It is also a good idea to ensure the compost that you use for re-potting is warmed by keeping it inside the greenhouse prior to using it. I always draw water each day and let it stand in the greenhouse for a few hours, so that it is not cold straight from the tap, only drawing enough water for each day and disposing of any left over at the end of the day. This precaution will prevent any 'nasties' developing in water that is stood for days on end.
The next stage (to be discussed in the next article) is to obtain 2 litre pots and sufficient compost for potting on again - also a good fertiliser such as Vitax Q4 will be needed.
© Copyright Digger Evans 2009